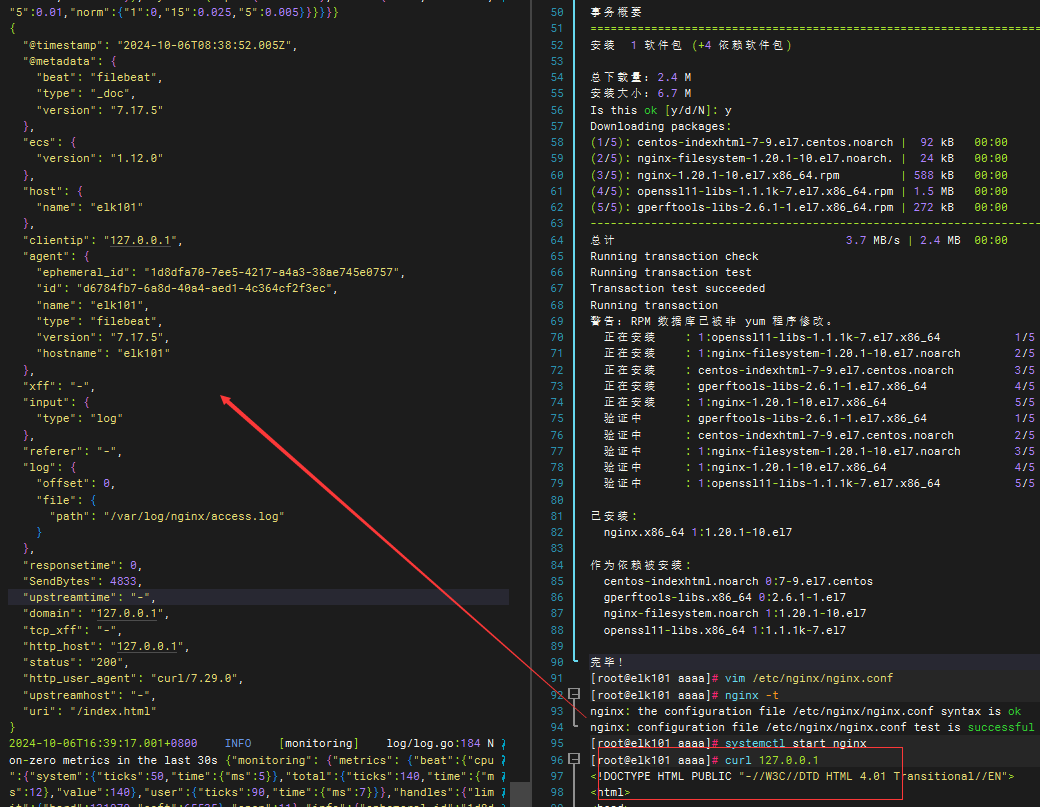
收集 nginx日志
### 默认
yum -y install nginx
systemctl start nginx


(2)使用filebeat采集nginx日志
[root@elk103 filebeat-7.17.5-linux-x86_64]# cat config/log_nginx.yaml
filebeat.inputs:
- type: log
  paths:
    - /var/log/nginx/access.log*

output.console:
  # 表示输出的内容以漂亮的格式显示
  pretty: true

[root@elk103 filebeat-7.17.5-linux-x86_64]# filebeat -e -c config/log_nginx.yaml
## 使用filebeat采集nginx的json格式日志

(1)修改nginx的配置文件  (注释以前的)
# vim /etc/nginx/nginx.conf

...
    # log_format  main  '$remote_addr - $remote_user [$time_local] "$request" '
    #                   '$status $body_bytes_sent "$http_referer" '
    #                   '"$http_user_agent" "$http_x_forwarded_for"';

    # access_log  /var/log/nginx/access.log  main;

    log_format nginx_json '{"@timestamp":"$time_iso8601",'
                              '"host":"$server_addr",'
                              '"clientip":"$remote_addr",'
                              '"SendBytes":$body_bytes_sent,'
                              '"responsetime":$request_time,'
                              '"upstreamtime":"$upstream_response_time",'
                              '"upstreamhost":"$upstream_addr",'
                              '"http_host":"$host",'
                              '"uri":"$uri",'
                              '"domain":"$host",'
                              '"xff":"$http_x_forwarded_for",'
                              '"referer":"$http_referer",'
                              '"tcp_xff":"$proxy_protocol_addr",'
                              '"http_user_agent":"$http_user_agent",'
                              '"status":"$status"}';

    access_log  /var/log/nginx/access.log  nginx_json;


(2)热加载nginx
systemctl reload nginx
> /var/log/nginx/access.log


(3)测试访问nginx
curl http://10.0.0.101/


### 编辑文件
vi config/nginx_json.yaml
filebeat.inputs:
- type: log
  paths:
    - /var/log/nginx/access.log*
  json.keys_under_root: true
  json.add_error_key: true

output.console:
  # 表示输出的内容以漂亮的格式显示
  pretty: true

监控tomcat
(1)安装tomcat
1.1 下载tomcat软件包
wget apache-tomcat-9.0.73.tar.gz
1.2 解压软件包
tar xf apache-tomcat-9.0.73.tar.gz -C /app/
------------------------------------------------
(2)修改tomcat的配置文件
cd /app/apache-tomcat-9.0.73/conf
cp server.xml{,.bak}
vim server.xml
...(切换到行尾修改,大概是在133-149之间)
<Host name="tomcat.aaa.com" appBase="webapps"
unpackWARs="true" autoDeploy="true">
<Valve className="org.apache.catalina.valves.AccessLogValve" directory="logs"
prefix="tomcat.oldboyedu.com_access_log" suffix=".txt"
pattern="{"clientip":"%h","ClientUser":"%l","authenticated":"%u","AccessTime":"%t","request":"%r","status":"%s","SendBytes":"%b","Query?string":"%q","partner":"%{Referer}i","http_user_agent":"%{User-Agent}i"}"/>
</Host>
(3)配置环境变量并启动tomcat服务
[root@elk103 logs]# cat /etc/profile.d/tomcat.sh
#!/bin/bash
export TOMCAT_HOME=/oldboyedu/softwares/apache-tomcat-9.0.73
export PATH=$PATH:$TOMCAT_HOME/bin
[root@elk103 logs]# source /etc/profile.d/tomcat.sh
[root@elk103 logs]# catalina.sh start
(4)使用filebeat采集tomcat日志
[root@elk103 filebeat-7.17.5-linux-x86_64]# cat config/08-log_tomcat-to-console.yaml
filebeat.inputs:
- type: log
paths:
- /app/apache-tomcat-9.0.73/logs/tomcat.oldboyedu.com_access_log*.txt
json.keys_under_root: true
json.add_error_key: true
output.console:
# 表示输出的内容以漂亮的格式显示
pretty: true
-----------------------------------------------------------------------
采集tomcat的错误日志多行匹配案例
[root@elk103 filebeat-7.17.5-linux-x86_64]# cat config/09-log-tomcat_error-to-es.yaml
filebeat.inputs:
- type: log
paths:
- /app/apache-tomcat-9.0.73/logs/catalina*
multiline.type: pattern
multiline.pattern: '^\d{2}'
multiline.negate: true
multiline.match: after
# 指定输出端为ES集群
output.elasticsearch:
hosts: ["http://10.0.0.101:9200","http://10.0.0.102:9200","http://10.0.0.103:9200"]
[root@elk103 filebeat-7.17.5-linux-x86_64]# ./filebeat -e -c config/09-log-tomcat_error-to-es.yaml
