Pushgareway的介绍
使用脚本监控将数据推送到pushgateway上,Promethues从pushgateway中拉取数据

它是可以单独运行在任何节点(不一定是在被监控客户端)上的插件,然后通过用户自定义开发脚本把需要监控
的数据发送给pushgateway,再由pushgateway暴露http接口,而后由把prometheus server去pull数据。

pushgateway组件本身是没有任何抓取监控数据功能的,它只能被动的等待监控数据被推送过来。
pushgateway优缺点
优点:
	灵活性更强。
缺点:
	(1)存在单点瓶颈,假如有多个脚本同时发给一个pushgateway进程,如果该pushgateway进程挂掉
了,那么监控数据也就没了。
	(2)pushgateway并不能对发送过来的脚本采集数据进行更智能的判断,假如脚本中间采集出了问题,
那么有问题的数据pushgateway组件会照单全收发送给Prometheus server。

温馨提示:
对于缺点一,建议大家在生产环境中多制作开启几个pushgateway进程,以便于备份使用。
对于缺点二,建议大家在编写脚本时要注意业务逻辑,尽可能避免脚本出错的情况发生。
Prometheus关联Pushgateway
### 方法一 修改prometheus配置文件
[root@master01 ~]# vim /app/prometheus/prometheus.yml
scrape_configs:
...
- job_name: "pushgateway"
  static_configs:
    - targets: ["10.0.0.200:9091"]
...


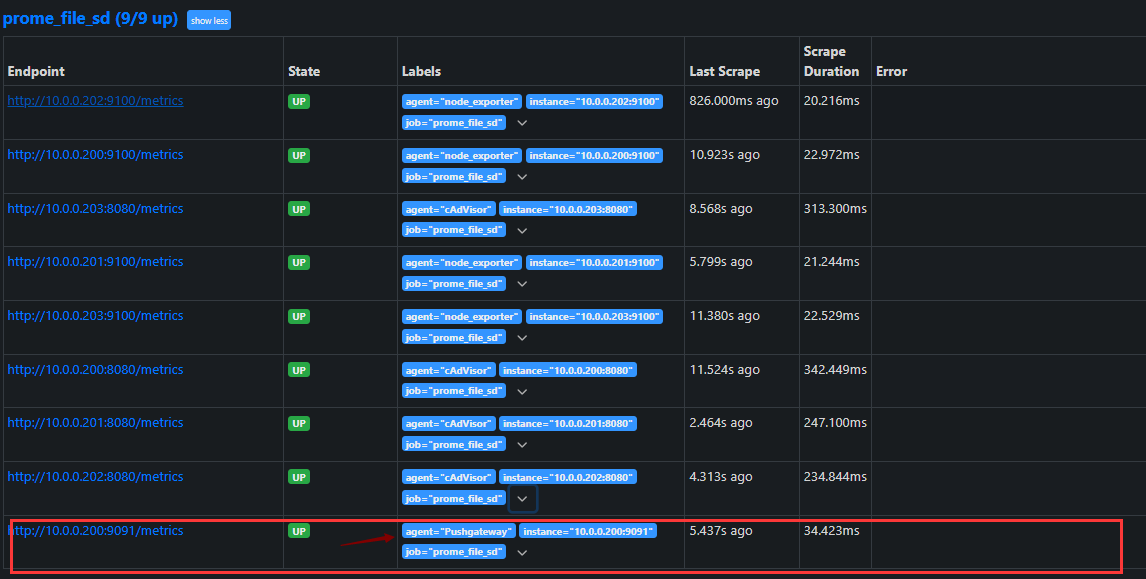
### 方法二 自动发现
[root@master ~]# vim /app/prometheus/file_sd/agent.yml
[
  {
    "targets":  ["10.0.0.200:9100","10.0.0.201:9100","10.0.0.202:9100","10.0.0.203:9100"],
    "labels": {
      "agent": "node_exporter"
    }
  },
  {
    "targets": ["10.0.0.200:8080","10.0.0.201:8080","10.0.0.202:8080","10.0.0.203:8080"],
    "labels": {
      "agent": "cAdVisor"
    }
   },
  {
    "targets": ["10.0.0.200:9091"],
     "labels": {
       "agent": "Pushgateway"
      }
   }
]

实战自定义监控-用户登陆数量
## 单个数据自定义
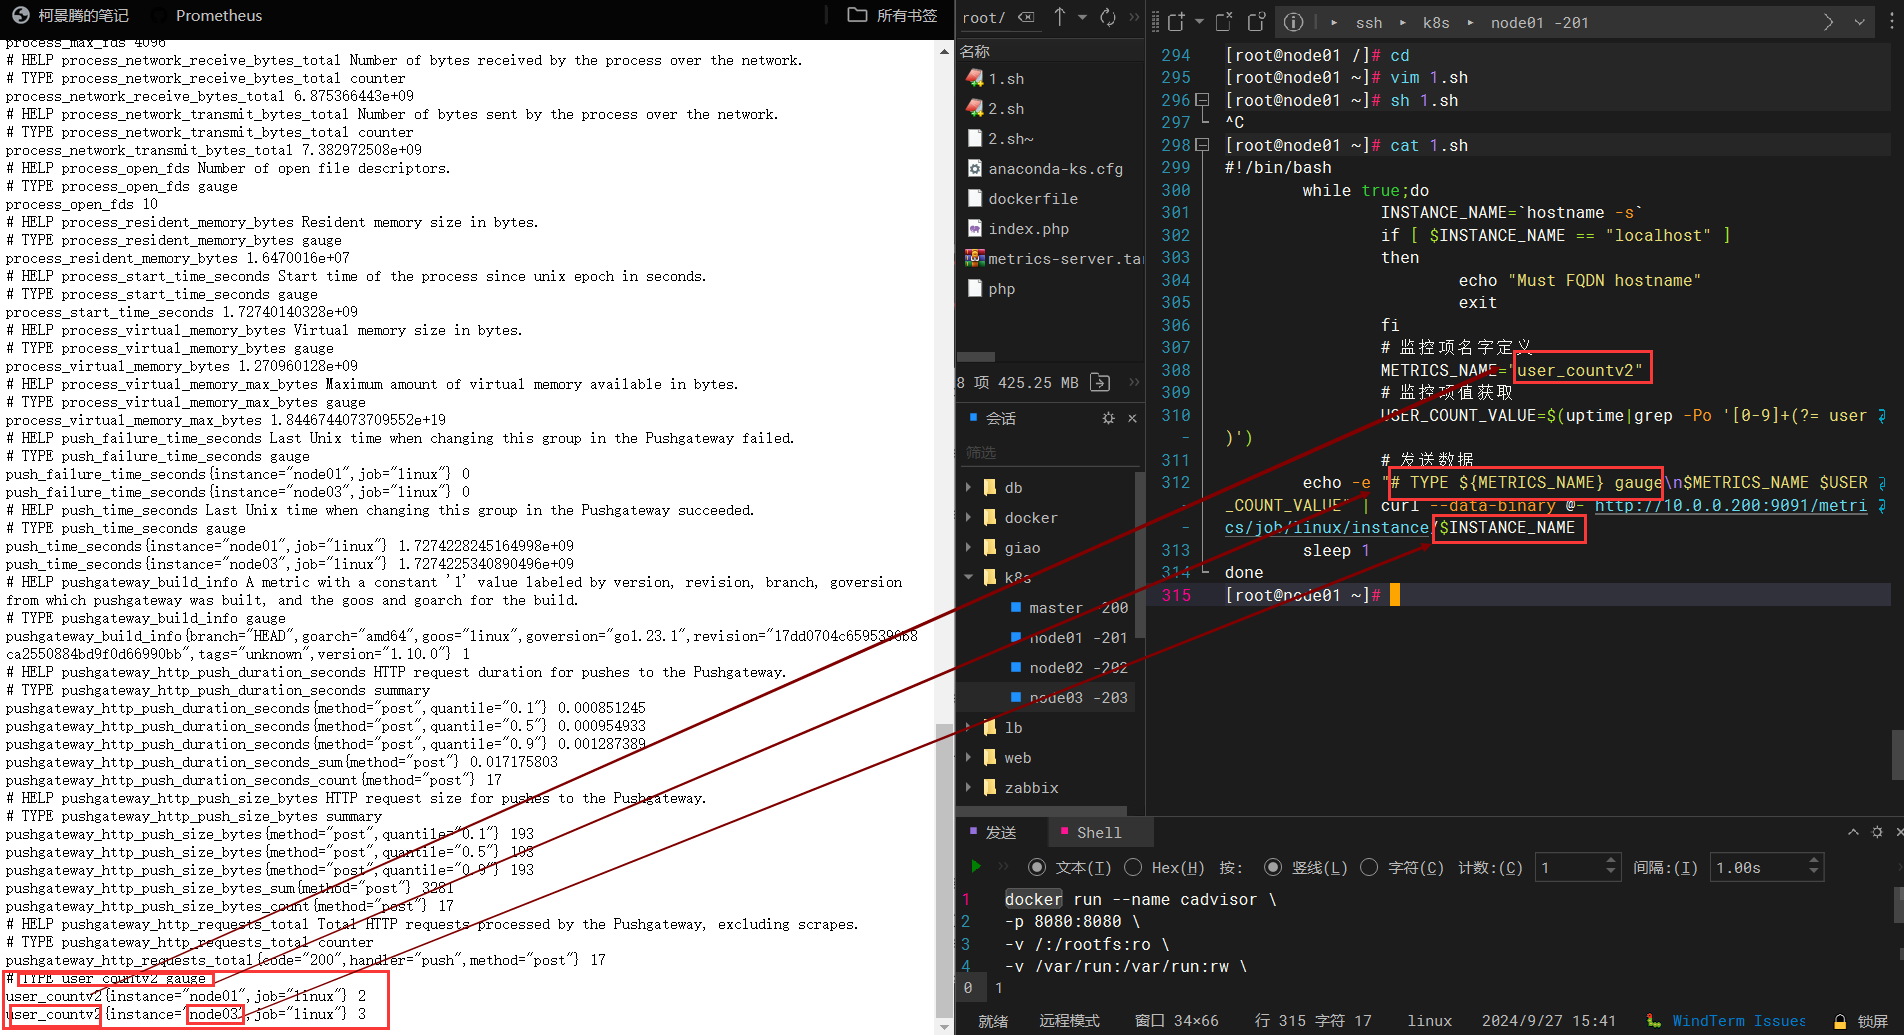
[root@node03 ~]# cat user_count.sh
#!/bin/bash
        while true;do
                INSTANCE_NAME=`hostname -s`
                if [ $INSTANCE_NAME == "localhost" ]
                then
                        echo "Must FQDN hostname"
                        exit
                fi
                # 监控项名字定义
                METRICS_NAME="user_countv2"
                # 监控项值获取
                USER_COUNT_VALUE=$(uptime|grep -Po '[0-9]+(?= user)')
                # 发送数据
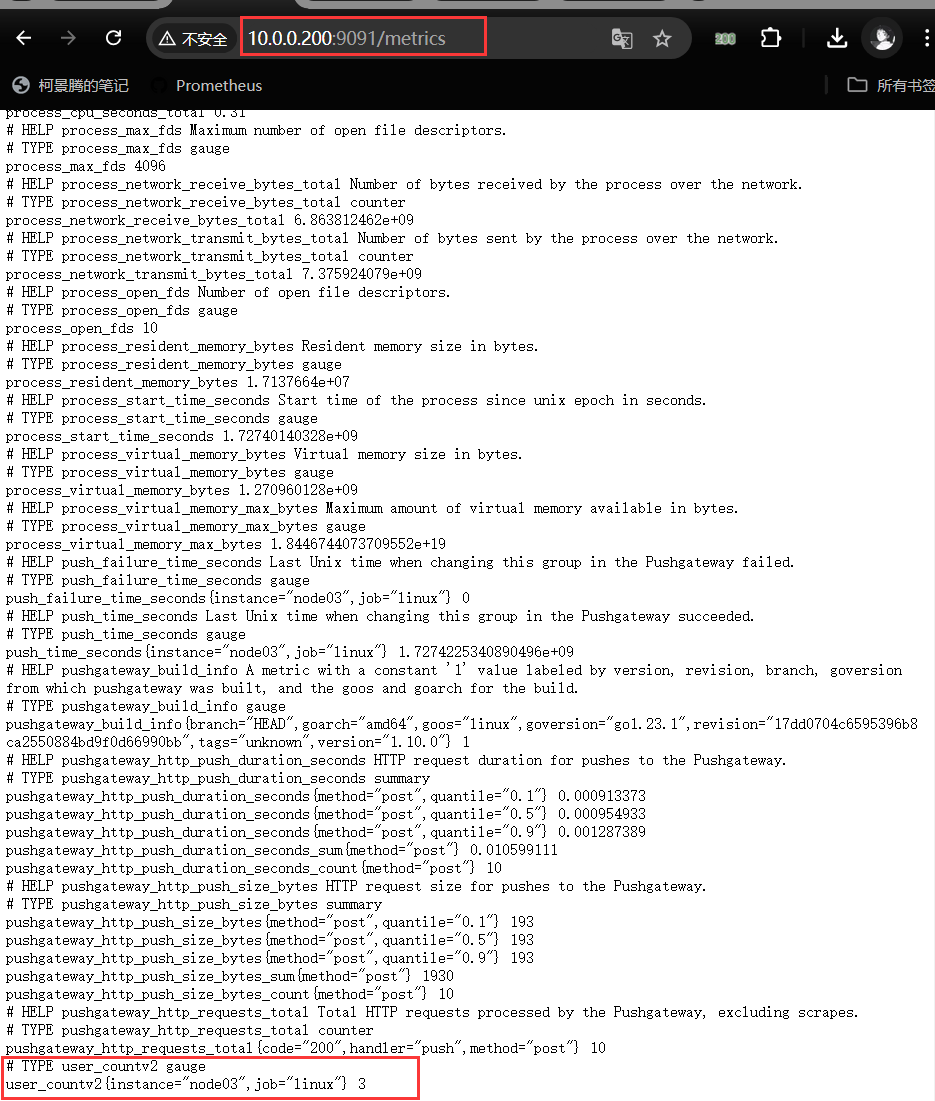
        echo -e "# TYPE ${METRICS_NAME} gauge\n$METRICS_NAME $USER_COUNT_VALUE" | curl --data-binary @- http://10.0.0.200:9091/metrics/job/linux/instance/$INSTANCE_NAME
        sleep 1
done
#### 首次运行不要要上 while
job / linux   ## 这是一组机器
作业(Job)和实例(Instance)

## 使用supervisor管理监控脚本
[root@node03 ~]# cat /etc/supervisord.d/push.ini
[program:user_count]
directory=/root
command=/bin/bash -c "/bin/sh /root/user_count.sh"
autostart=true
autorestart=true
stdout_logfile=/var/log/node_exporter_stdout.log
stderr_logfile=/var/log/node_exporter_stderr.log
user=root
stopsignal=TERM
startsecs=5
startretries=3
stopasgroup=true
killasgroup=true


多行自定义监控 (基于文件)
#!/bin/bash

instance_name=$(hostname -s)
metrics_name=docker_runtime

# 确保机器名不是 "localhost"
if [ "$instance_name" == "localhost" ]; then
    echo "必须使用 FQDN 主机名"
    exit 1
fi

# 获取所有运行的容器名称
allname=$(docker ps --format "{{.Names}}")

# 获取容器运行时间的函数
function dockerruntime() {
    local container_name=$1
    local started_at=$(docker inspect -f '{{.State.StartedAt}}' "$container_name")
    local start_time=$(date +%s -d "$started_at")
    local current_time=$(date +%s)
    local runtime=$((current_time - start_time))
    echo "$runtime"
}

# 将指标头写入 "temp.log" 文件
{
    echo "# TYPE ${metrics_name} gauge"
    echo "# HELP ${metrics_name} time sec"
} > temp.log

# 循环处理每个容器,记录其运行时间
for container in ${allname}; do
    runtime=$(dockerruntime "$container")
    echo "$metrics_name{name=\"$container\",aaa=\"xxx\"} $runtime" >> temp.log
done

# 将指标上传到指定的 Pushgateway URL
curl --data-binary "@temp.log" "http://10.0.0.200:9091/metrics/job/docker_runtime/instance/$instance_name"


监控硬盘使用情况
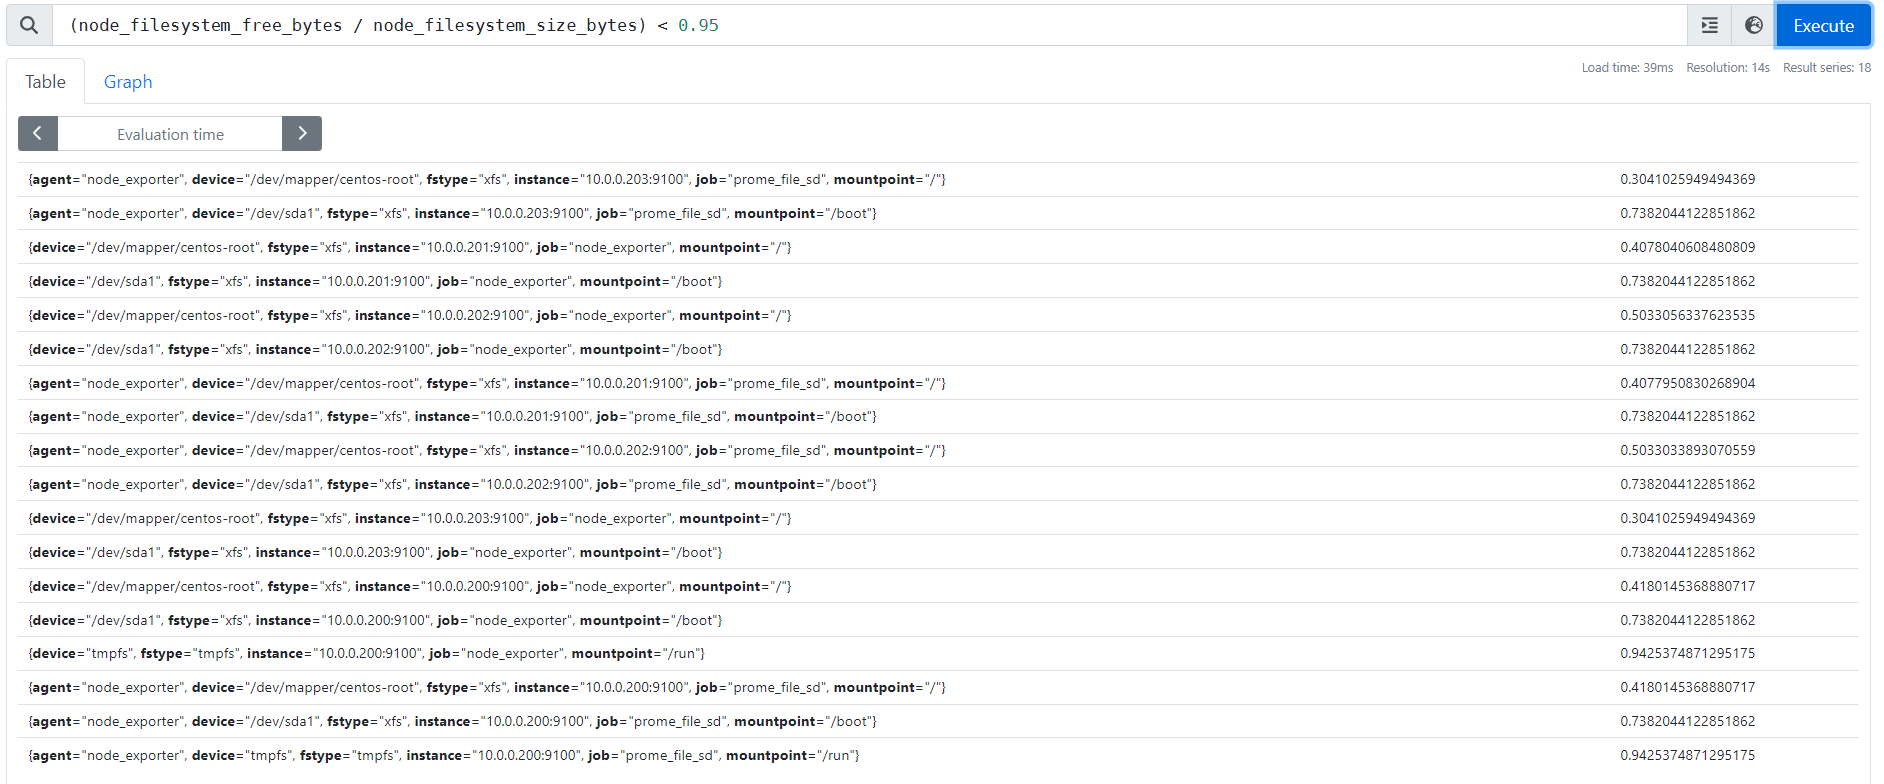
参考案例:
(node_filesystem_free_bytes / node_filesystem_size_bytes) < 0.95

node_filesystem_free_bytes{agent="node_exporter", instance="10.0.0.200:9100",mountpoint="/"} / node_filesystem_size_bytes{agent="node_exporter", instance="10.0.0.200:9100",mountpoint="/"}

温馨提示:
	(1)生产环境中建议大家将0.95改为0.20,表示当空闲硬盘小于20%的时候就显示在图上;
	(2)我之所以些0.95是因为我的空闲硬盘挺大的,为了让大家看到出图的效果而已。


监控磁盘IO
参考案例:
	rate(node_network_transmit_bytes_total[1m]) / 1024 / 1024

node_network_transmit_bytes_total:
网络传输字节数


